Leather Restoration: How to Save Damaged Upholstery?
Leather Restoration: A Second Life for Your Interior
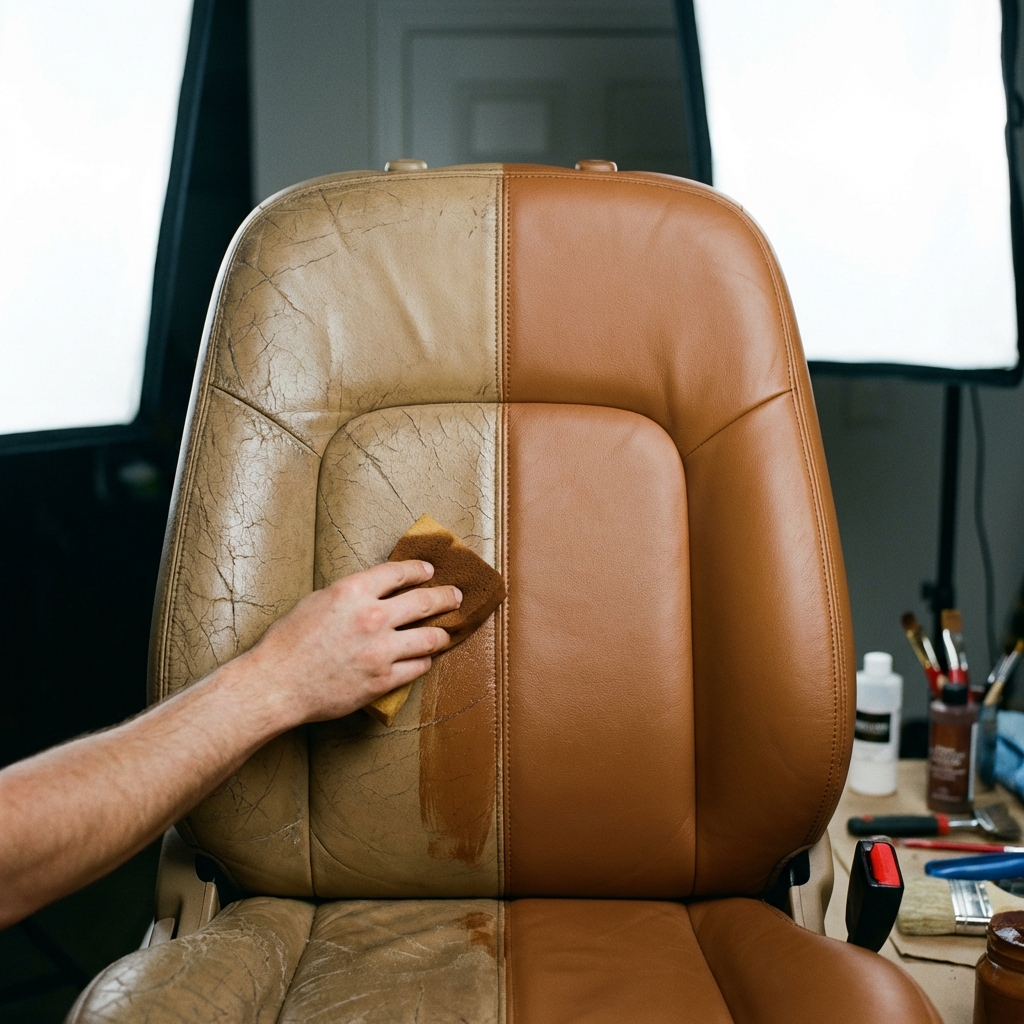
Leather in a car is synonymous with luxury. Unfortunately, over the years, it loses its luster. It wears from entry and exit (especially the driver’s side bolster), cracks from the sun and lack of hydration, and sometimes simply gets so dirty it loses its original color (dye transfer from jeans). Is the only solution a visit to the upholsterer and replacing the skin for thousands of dollars? Not necessarily. Leather restoration is a process that can work wonders.
Diagnosis: Cleaning or Painting?
Before you grab the paint, you must assess the patient.
- Dirt: If the leather is “shiny,” it means it’s dirty and greasy. Matte leather is clean leather (with the exception of high-gloss lacquered vintage leathers). Here, a thorough Cleaning is enough.
- Color Wear: If you see lighter patches, the top clear coat layer worn off, or raw suede-like leather showing through – painting is needed.
- Cracks and Holes: If the leather is torn, you need “Liquid Leather” (filler) and a sub-patch.
Step 1: Prep (Key to Success)
Just like in bodywork painting, 90% of success is preparation.
- Strong Cleaning: Use the strongest leather cleaner available. Scrub with a brush to remove old dirt from the pores.
- Solvent (GLD/Acetone): We must remove the old finish (Top Coat) and degrease the surface. Wipe the leather with solvent until you see color coming off on the cloth. This sign means we have “opened” the leather and fresh paint will adhere.
- Sanding: Gently sand the surface with an abrasive pad (600-800 grit) to smooth out rough edges and cracks.
Step 2: Repairing Defects (Liquid Leather)
Deep scratches and cracks are filled with “Liquid Leather.” This is a flexible filler that behaves like skin when dry.
- Apply with a spatula into the defect.
- Wait for it to dry and sink in.
- Sand smooth.
- Repeat until the surface is level.
- Pro Tip: You can use a “mold” to imprint a leather grain texture so the repair isn’t too smooth compared to the rest of the seat.
Step 3: Painting (Colouring)
Color matching is an art. You can send a headrest to a paint shop to match the perfect shade, or buy a ready-made kit for your car model (e.g., BMW Dakota Black).
- Base Coat: Apply paint with a sponge (to work it into crevices) or an airbrush (for a perfect finish).
- Layers: Better to apply 3-4 thin layers than one thick one that floods the texture. Dry each layer with a hair dryer or heat gun (carefully!).
Step 4: Protection (Top Coat)
This is the most important step for durability. Paint itself is delicate and can be sticky. We must apply a clear Top Coat.
- Finish: Choose Matt, Satin, or Gloss (usually Semi-Matt matches most extensive modern cars).
- Cross Linker: Add a hardener (Cross Linker) to the clear coat, which increases resistance to friction and sweat.
- Application: Spray 2-3 coats. This gives the leather its final look and feel (grip).
Post-Restoration Care
Freshly painted leather needs to “cure.” Try not to use the car intensively for the first 48-72 hours.
- Washing: For the first month, only wipe with a damp cloth.
- Maintenance: After a month, apply a protective cream (Lotion), which keeps the new coating flexible and protects against friction (the so-called slip layer).
Restoration is a process for the patient, but the satisfaction of restoring a destroyed seat to a “factory fresh” look is priceless. Remember: leather is a natural material – it’s worth caring for it so it serves you for years.
Professional Detailing Gear
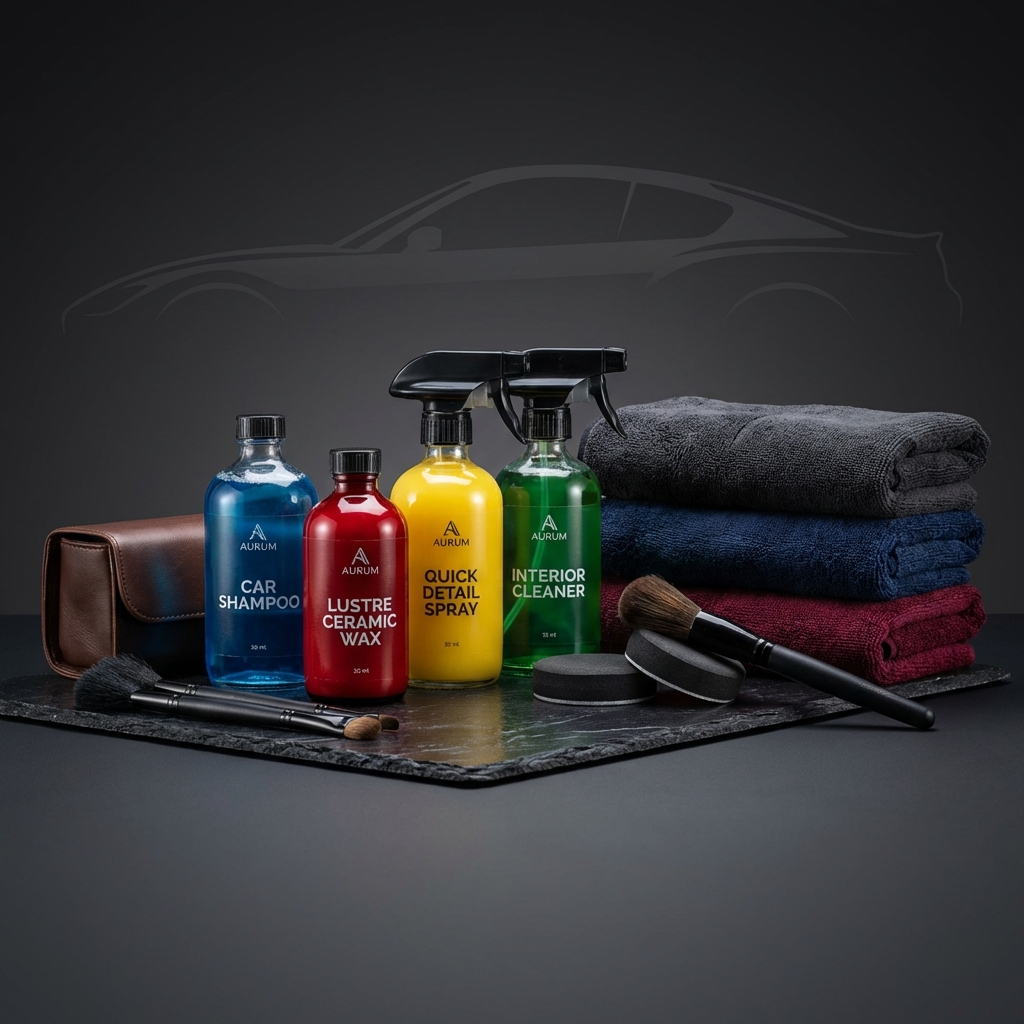
Complete Detailing Kit
Everything you need to start: Shampoo, Wax, Sprays & Towels.
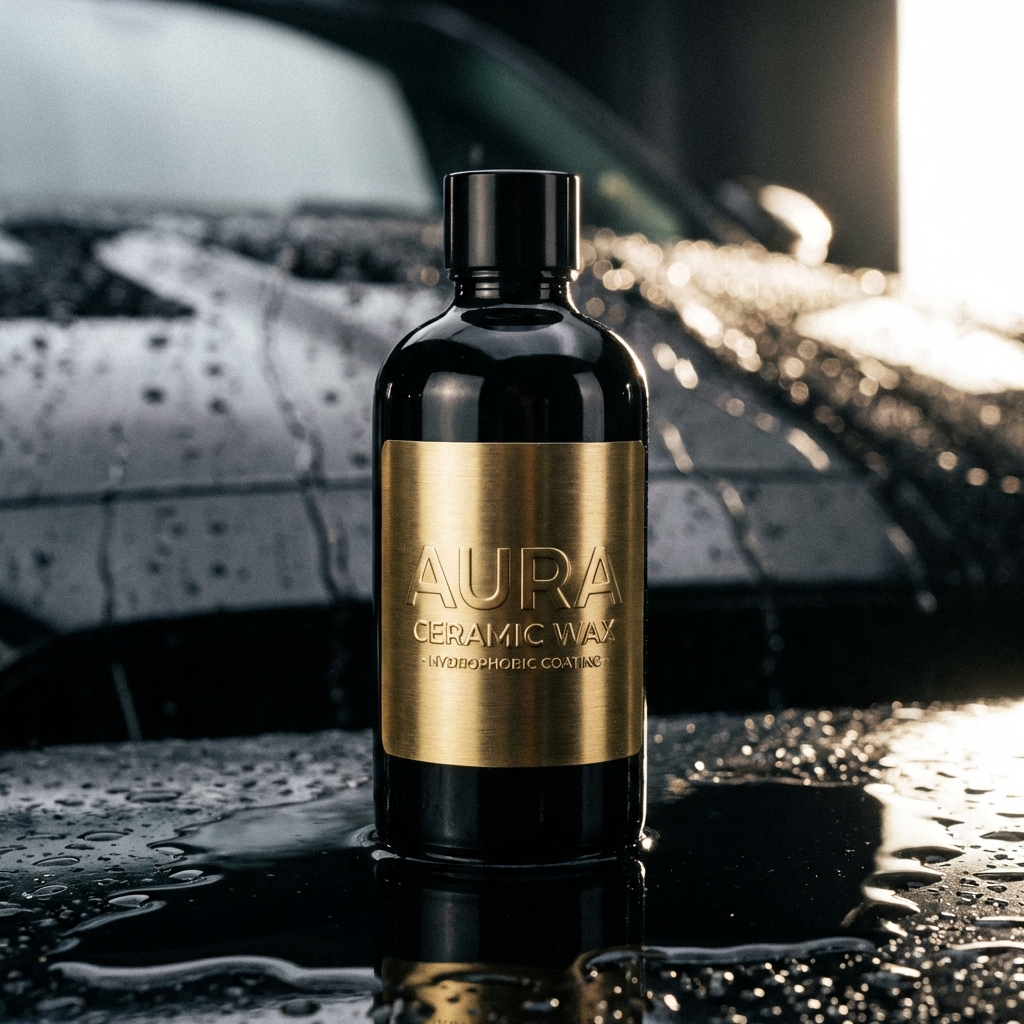
Ultimate Liquid Wax
Long-lasting hydrophobic protection with a mirror-like deep shine.
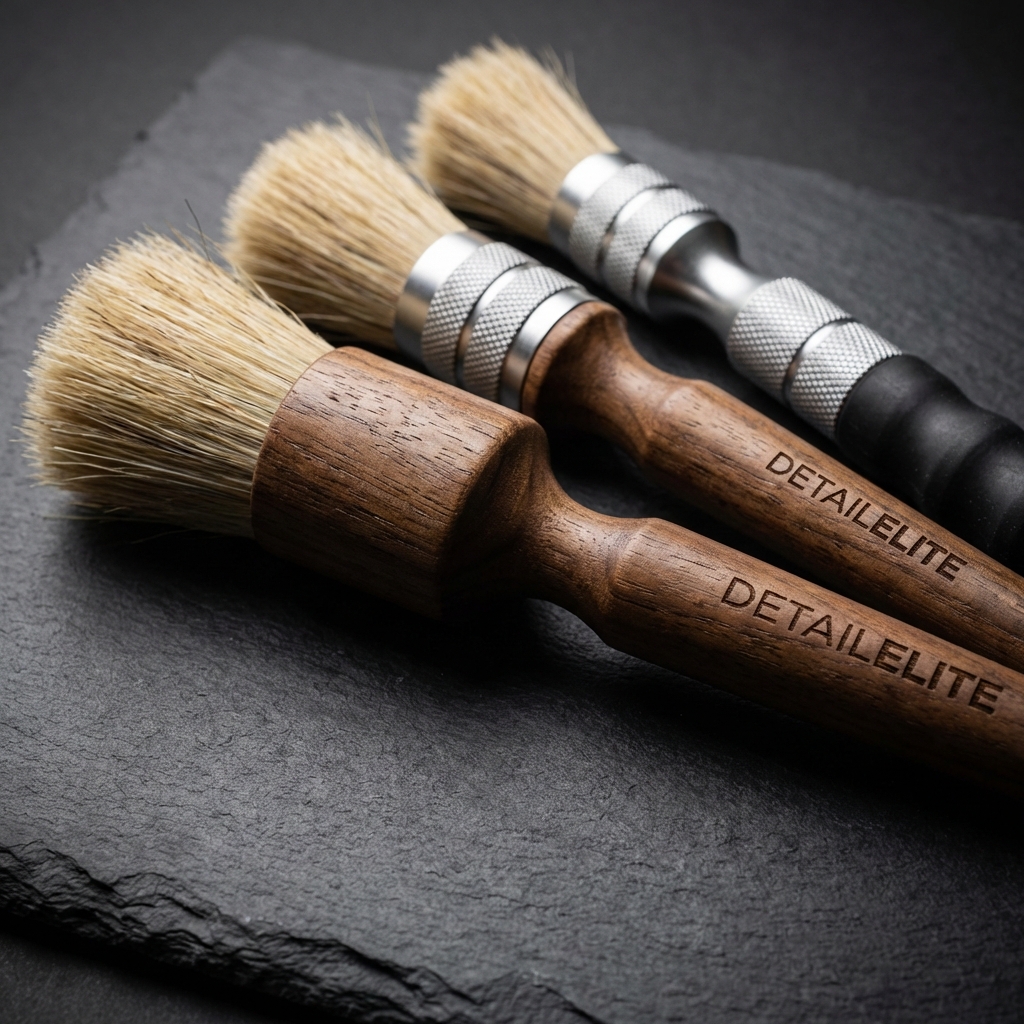
Premium Brush Set
Ultra-soft bristles for safe cleaning of vents, emblems, and details.